Step 1: Navigate to Projects
After connecting your GitHub account, go to the Projects page at https://cloud.doploy.io/project/. Click “New Project” to get started.Step 2: Configure Your Project
Fill in your project details: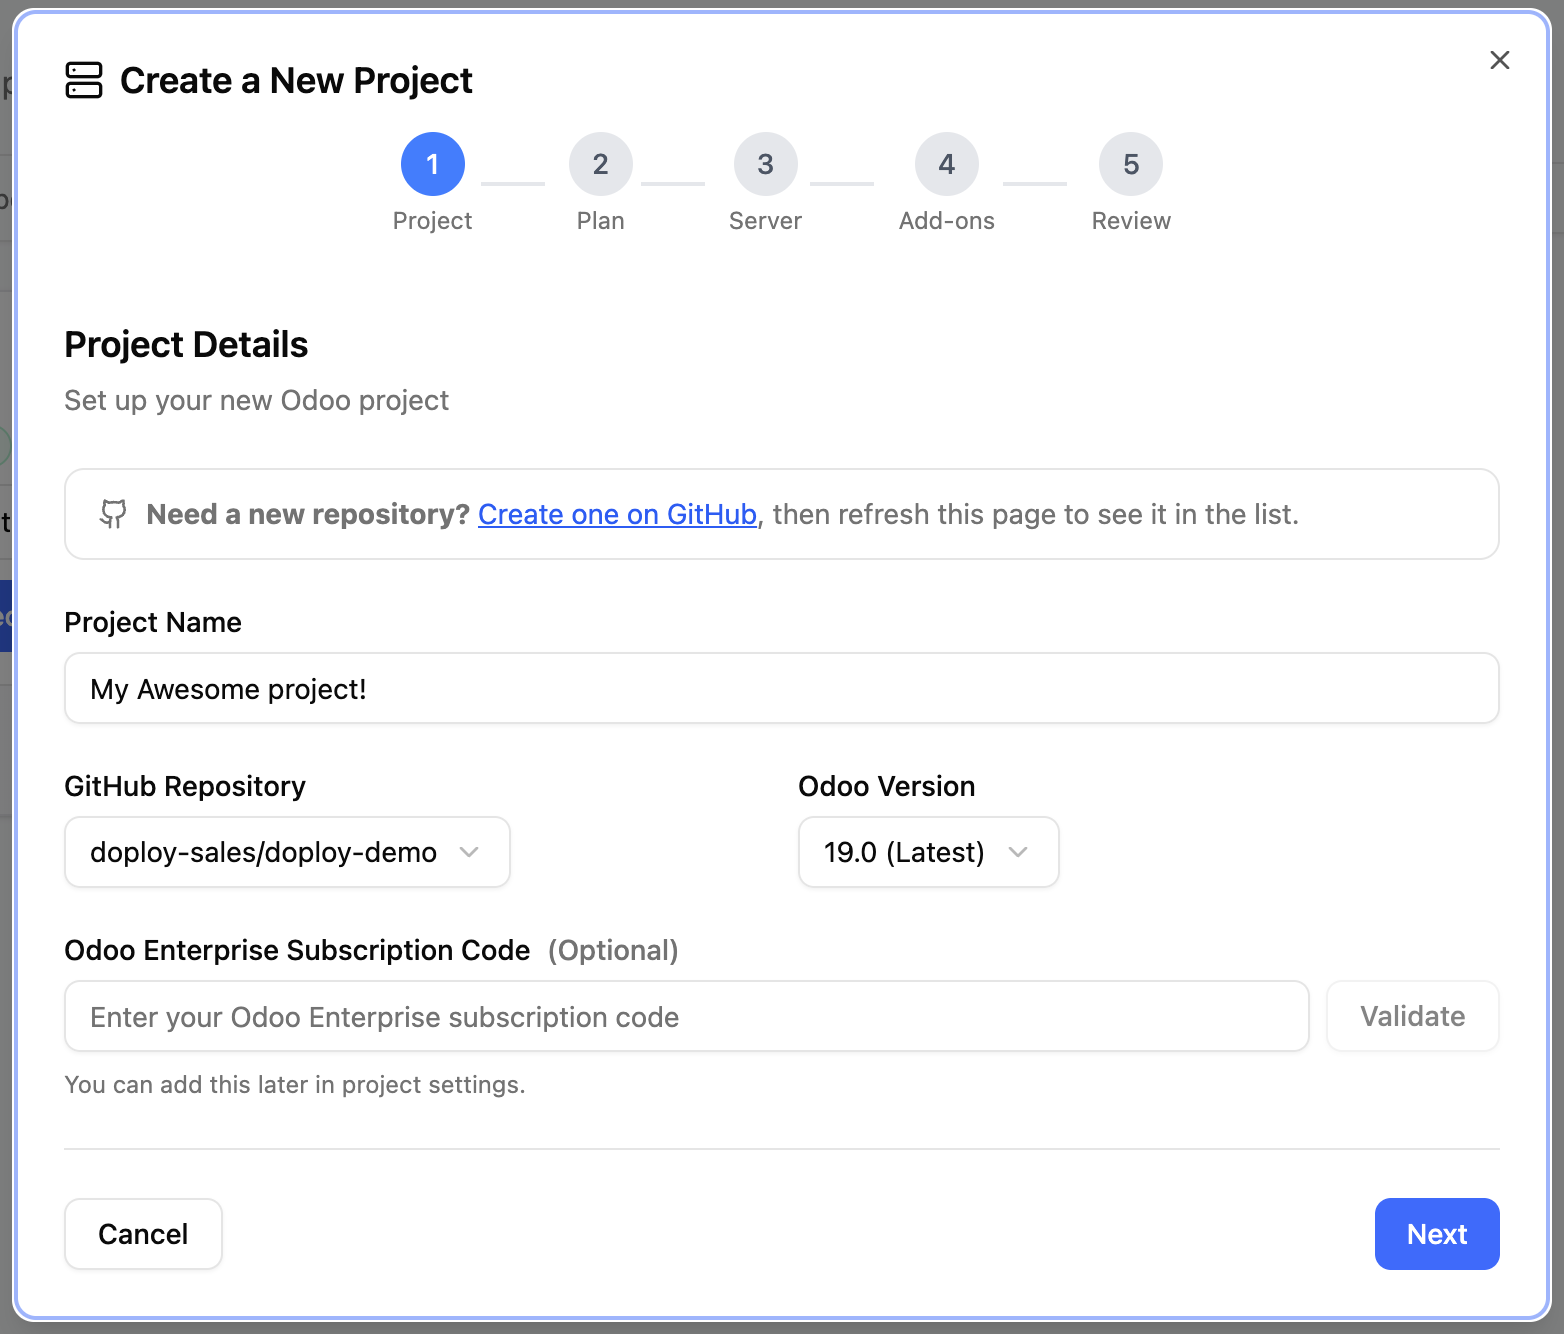
Step 3: Select Your Plan
Choose the billing plan that fits your needs. Review the available plans at https://doploy.io/#pricing.Step 4: Select Your Server
Choose where to host your Odoo instance:doploy Servers (Recommended)
We recommend using doploy-managed servers for the best experience:- Easy scaling - Upgrade your server resources anytime by contacting support
- Better support - Our team can quickly diagnose, monitor, and resolve issues before you detect them
- Optimized performance - Servers configured specifically for Odoo
Bring Your Own Server (BYOS)
Available on Pro plan and enterprise. Connect your own infrastructure if you need complete control over your server environment. Learn more about BYOS.Step 5: Configure Add-ons
Select any additional services you want to include with your project: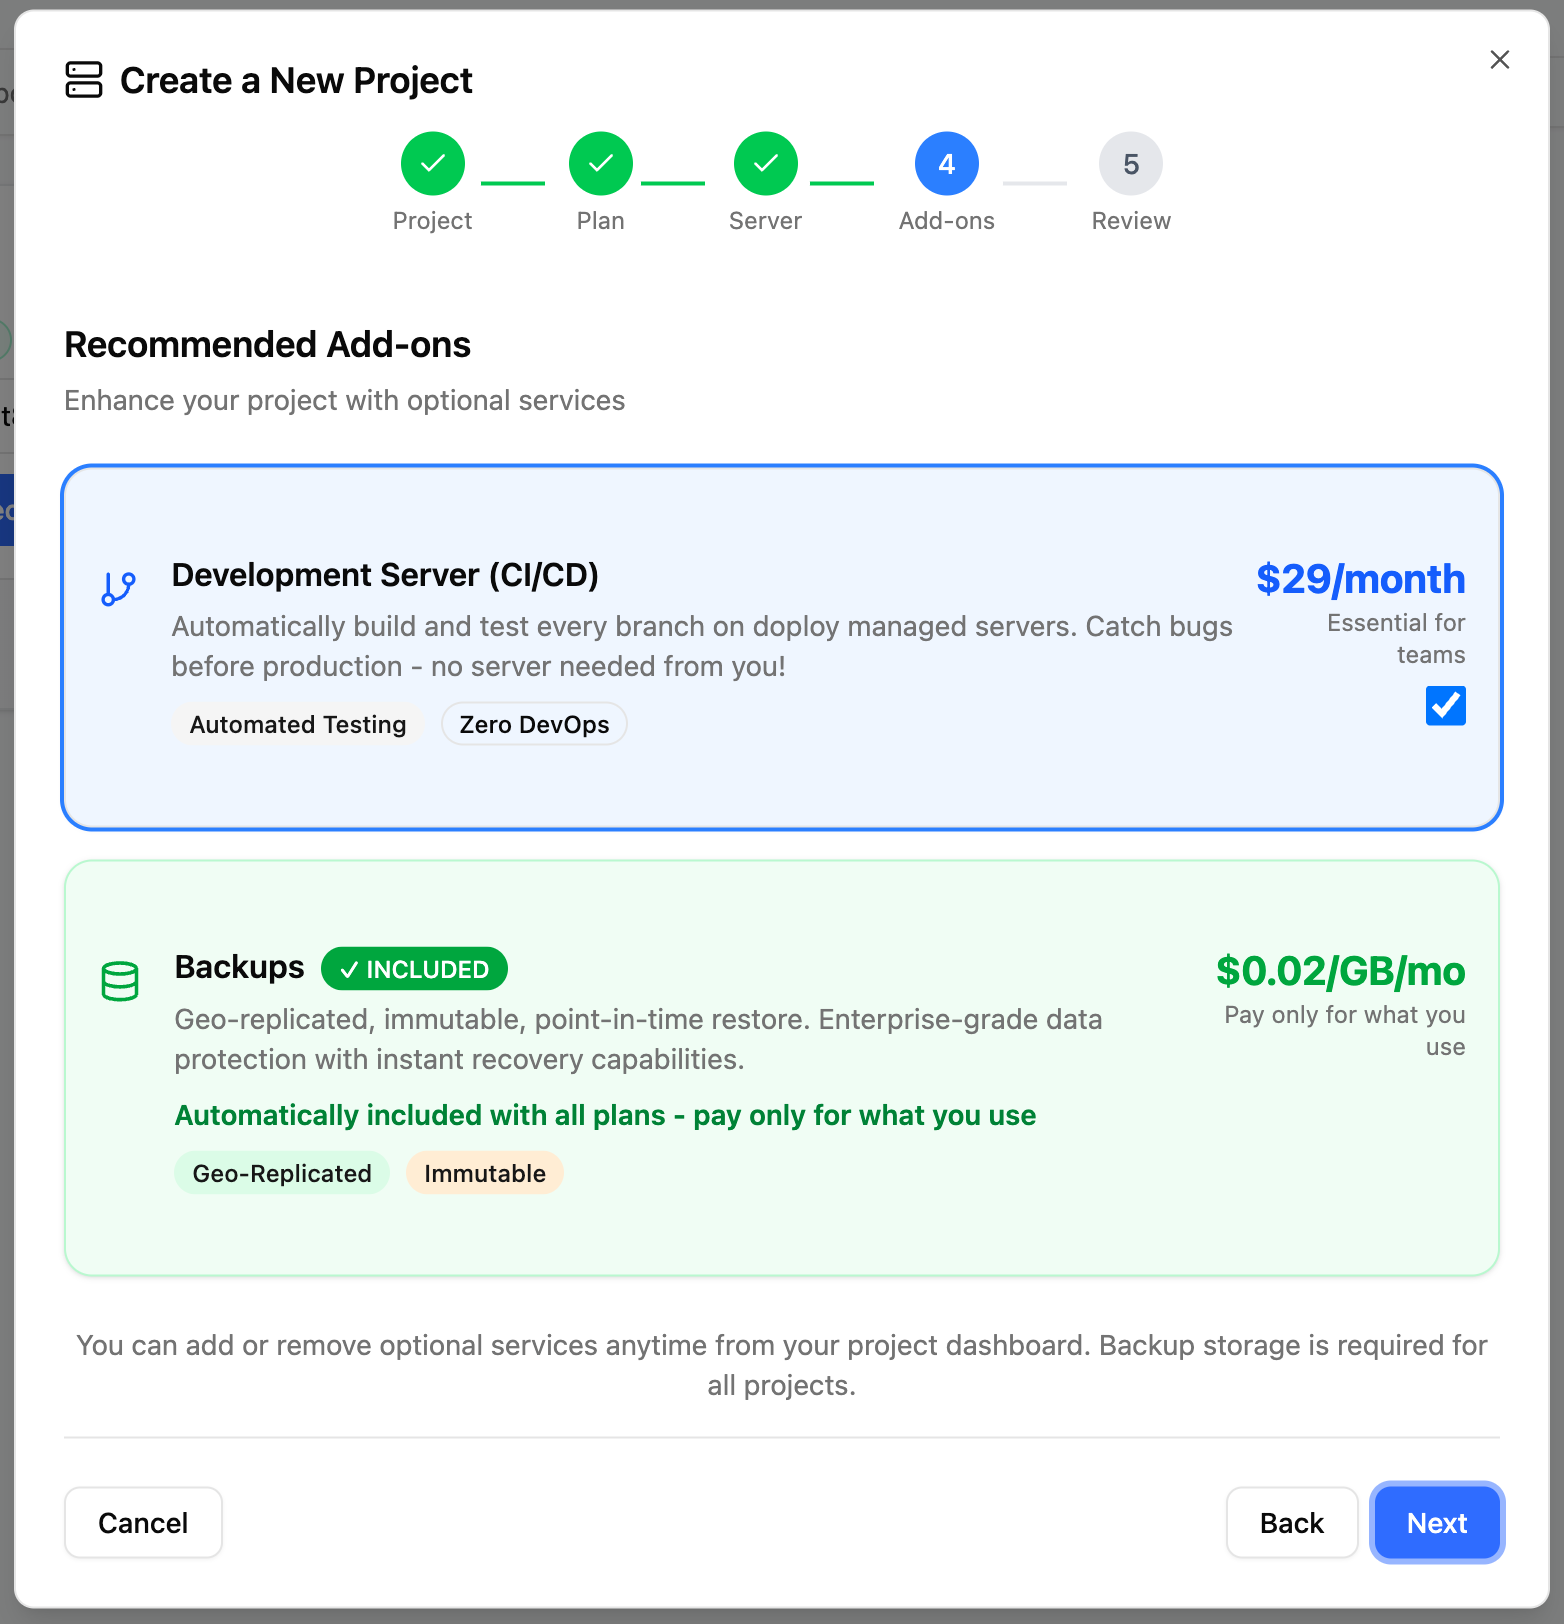
Development Server (Recommended)
A dedicated development server gives you:- Safe testing environment - Test your code against Odoo’s test suite
- Faster development - No need to set up local Odoo environments
- Team collaboration - Share a consistent dev environment with your team
- Easy debugging - Full access to logs and SSH for troubleshooting
- We handle the compute - doploy provides all the resources, no setup required
- Unlimited dev builds - Deploy and test as many times as you need