> ## Documentation Index
> Fetch the complete documentation index at: https://docs.doploy.io/llms.txt
> Use this file to discover all available pages before exploring further.
# Creating Your Project
> Create your first project in doploy
## Step 1: Navigate to Projects
After connecting your GitHub account, go to the Projects page at [https://cloud.doploy.io/project/](https://cloud.doploy.io/project/).
Click "New Project" to get started.
## Step 2: Configure Your Project
Fill in your project details:
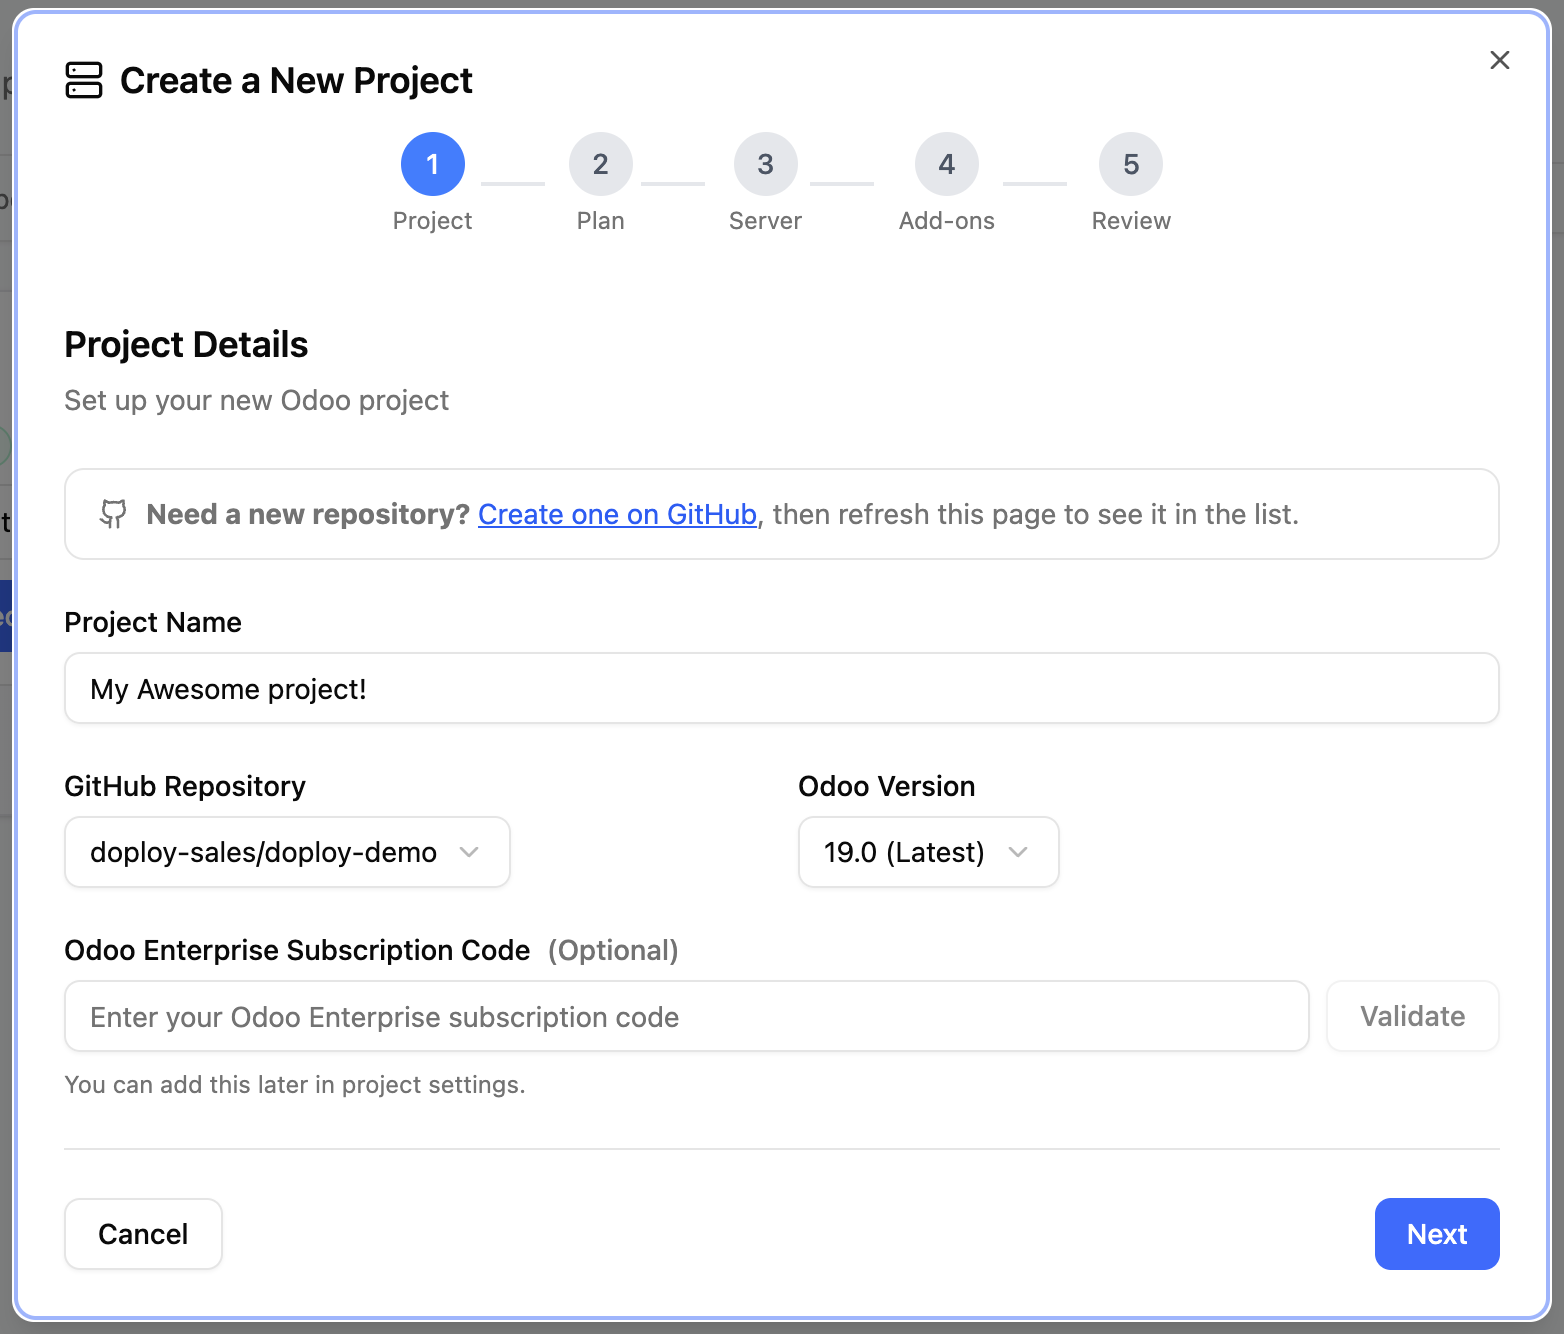 **Project Name** - Choose a descriptive name for your project (e.g., "Production ERP")
**Repository** - Select the GitHub repository you connected earlier that contains your Odoo code
## Step 3: Select Your Plan
Choose the billing plan that fits your needs. Review the available plans at [https://doploy.io/#pricing](https://doploy.io/#pricing).
## Step 4: Select Your Server
Choose where to host your Odoo instance:
### doploy Servers (Recommended)
We recommend using doploy-managed servers for the best experience:
* **Easy scaling** - Upgrade your server resources anytime by contacting support
* **Better support** - Our team can quickly diagnose, monitor, and resolve issues before you detect them
* **Optimized performance** - Servers configured specifically for Odoo
**Note:** Starter plan users must use doploy servers.
### Bring Your Own Server (BYOS)
Available on Pro plan and enterprise. Connect your own infrastructure if you need complete control over your server environment. [Learn more about BYOS](/servers/adding-your-own).
## Step 5: Configure Add-ons
Select any additional services you want to include with your project:
**Project Name** - Choose a descriptive name for your project (e.g., "Production ERP")
**Repository** - Select the GitHub repository you connected earlier that contains your Odoo code
## Step 3: Select Your Plan
Choose the billing plan that fits your needs. Review the available plans at [https://doploy.io/#pricing](https://doploy.io/#pricing).
## Step 4: Select Your Server
Choose where to host your Odoo instance:
### doploy Servers (Recommended)
We recommend using doploy-managed servers for the best experience:
* **Easy scaling** - Upgrade your server resources anytime by contacting support
* **Better support** - Our team can quickly diagnose, monitor, and resolve issues before you detect them
* **Optimized performance** - Servers configured specifically for Odoo
**Note:** Starter plan users must use doploy servers.
### Bring Your Own Server (BYOS)
Available on Pro plan and enterprise. Connect your own infrastructure if you need complete control over your server environment. [Learn more about BYOS](/servers/adding-your-own).
## Step 5: Configure Add-ons
Select any additional services you want to include with your project:
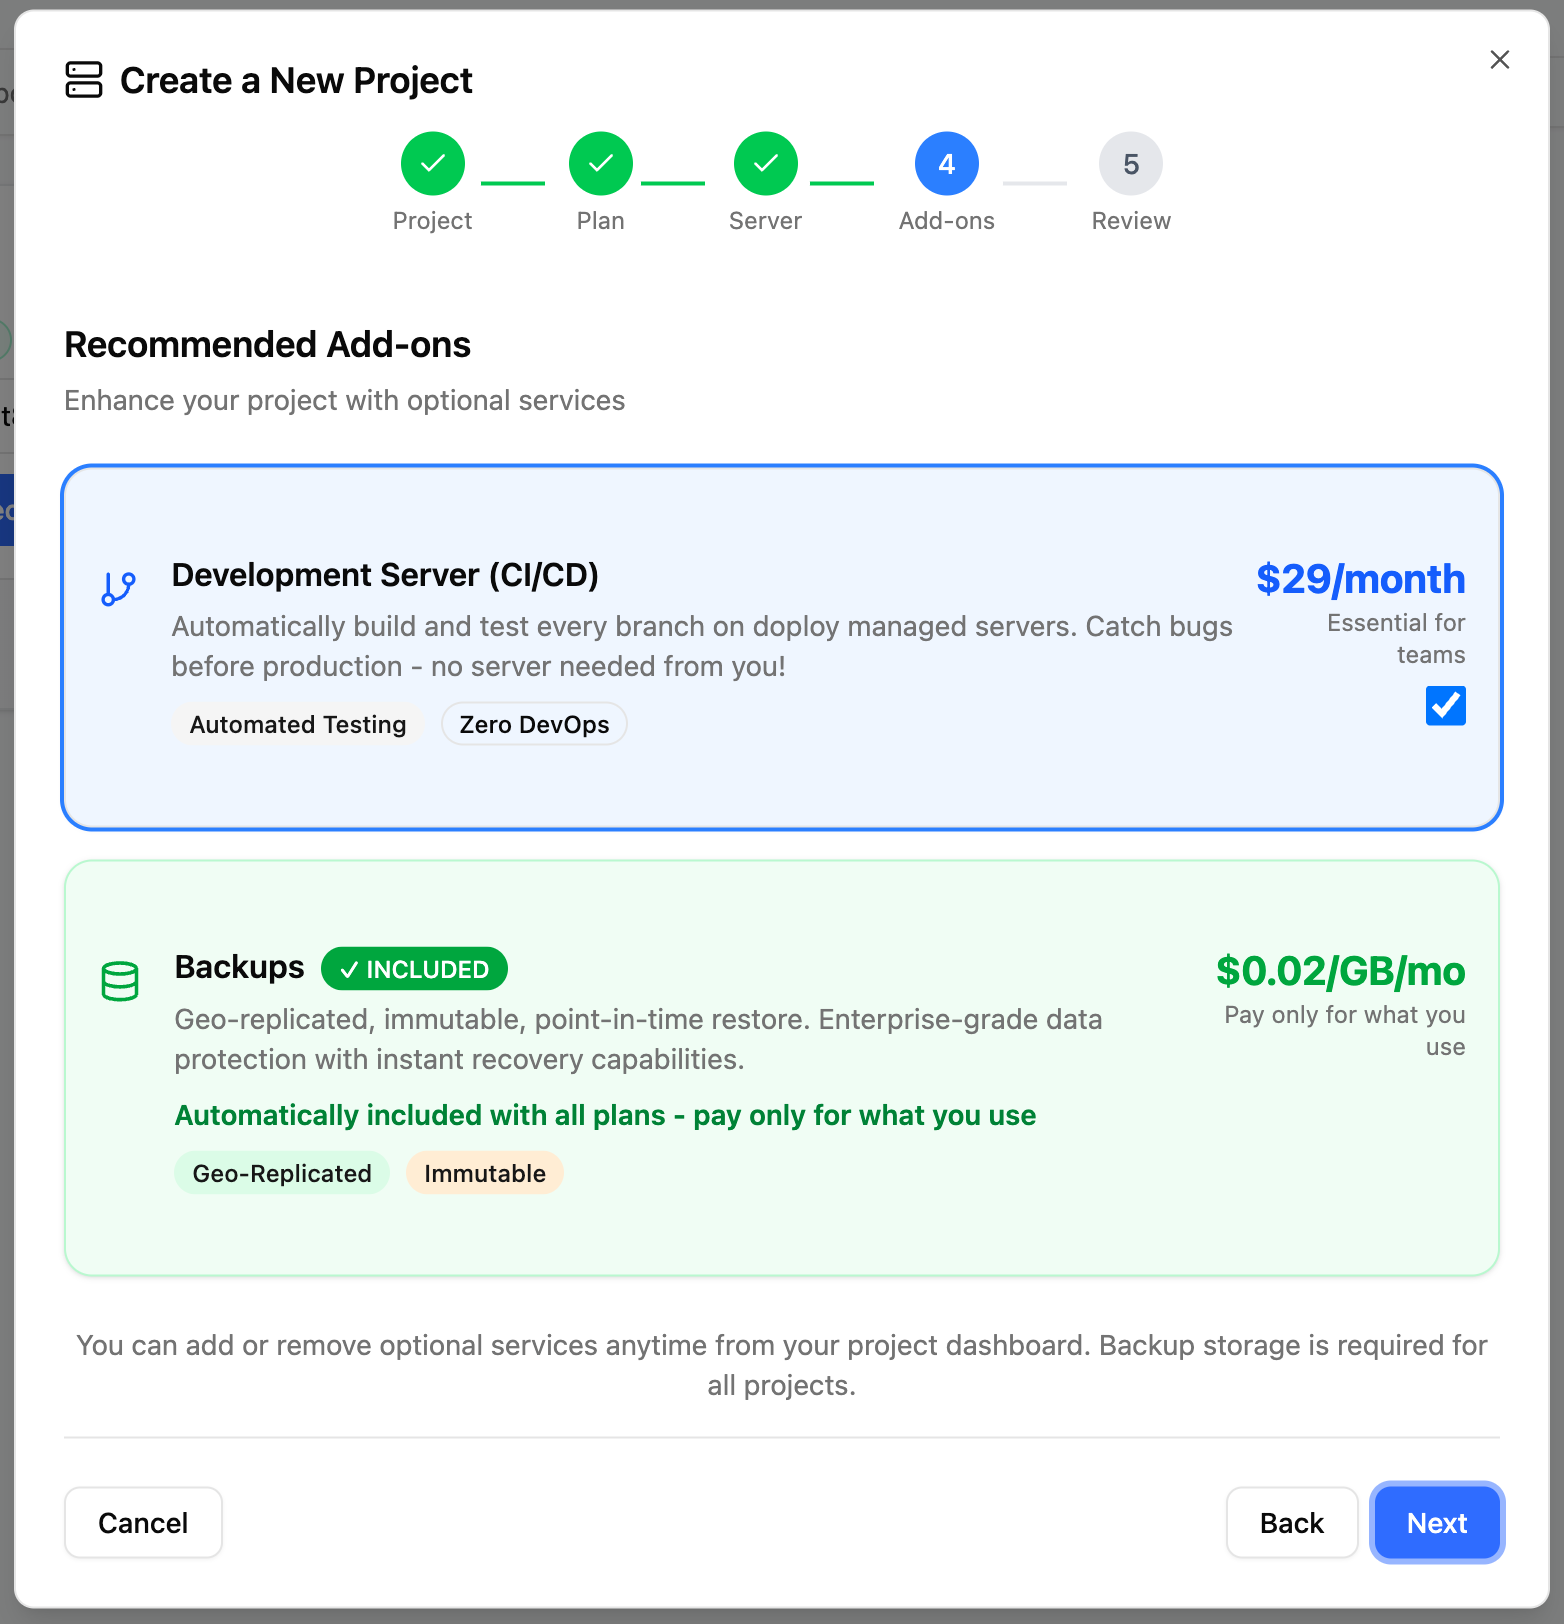 ### Development Server (Recommended)
A dedicated development server gives you:
* **Safe testing environment** - Test your code against Odoo's test suite
* **Faster development** - No need to set up local Odoo environments
* **Team collaboration** - Share a consistent dev environment with your team
* **Easy debugging** - Full access to logs and SSH for troubleshooting
* **We handle the compute** - doploy provides all the resources, no setup required
* **Unlimited dev builds** - Deploy and test as many times as you need
Development servers help you catch code issues early before impacting your users.
### Add-ons
Add-ons can be added or removed anytime from your project settings.
## Step 6: Create Project
Review your configuration and click "Create Project" to finish.
### Next Steps
**If you selected a doploy server:** You're ready to [create an instance](/getting-started/creating-instance) and deploy your Odoo application.
**If you selected Bring Your Own Server:** First [add your server](/servers/adding-your-own) to doploy, then you can create an instance.
### Development Server (Recommended)
A dedicated development server gives you:
* **Safe testing environment** - Test your code against Odoo's test suite
* **Faster development** - No need to set up local Odoo environments
* **Team collaboration** - Share a consistent dev environment with your team
* **Easy debugging** - Full access to logs and SSH for troubleshooting
* **We handle the compute** - doploy provides all the resources, no setup required
* **Unlimited dev builds** - Deploy and test as many times as you need
Development servers help you catch code issues early before impacting your users.
### Add-ons
Add-ons can be added or removed anytime from your project settings.
## Step 6: Create Project
Review your configuration and click "Create Project" to finish.
### Next Steps
**If you selected a doploy server:** You're ready to [create an instance](/getting-started/creating-instance) and deploy your Odoo application.
**If you selected Bring Your Own Server:** First [add your server](/servers/adding-your-own) to doploy, then you can create an instance.